|
Factory Specifications
Body: Fiberglass on steel backbone chassis
Curb weight: approx 1550 lbs
Suspension: fully independent
Brakes: front disks, rear drums, dual pwr-assist
Engine: 1558cc Lotus-Cosworth DOHC "big valve"
2x Zenith-Stromberg carburettors
Power 126 bhp @ 6500 rpm,
Torque 113 ft-lb @ 5500rpm
0-60 Mph in 6.6 seconds, top speed 123 mph.
Air drag coefficient: 0.29
|
Barbara's Lotus Europa
1973 Federal Twincam Special, Serial #3153R
Welcome to my Europa page. I reorganized it a bit. Now it's a story that starts at the top. To skip the
parts you've already seen, use the table of contents below to take you directly to new entries. Remember,
the photos are thumbnails - to see a much larger picture, click
on the small ones and you will see the full picture.
Contents by date:
8-2-2002: Reflections while waiting.
8-10-2002: Arrival
10-20-2002: What do you mean, "replace everything"?
10-22-2002: Planning on a new dash.
6-4-2003: Fabricating the new dash.
9-13-2005: I'm in a box!
9-14-2005: Preview of redesigned dash.
10-31-2005: Schematic of Early Special.
August 2, 2002.
Amazingly, I got this car by being the high bidder on July 24th 2002, on an Ebay auction.
I bought the car without ever having seen or driven it. (I did have some
additional sources of information on this specific car other than the Ebay advertisement, though.)
Here is the original Ebay listing.
After some tortured negotiations with the seller's friend whose mother was the
actual owner of the car (!), and who decided at the last minute to back
out of the auction based on advice from his uncle,
the transaction finally got underway through
escrow.com. I arranged with
Dash Auto Express to
ship the car. The quoted price was $950 for shipment in an open carrier from Cortlandt Manor,
New York, to Scotts Valley, CA. I paid a deposit of $150 by credit card to them. Shortly
after that I discovered that "Dash" had only been in business for a month or so! Their
federal license had just been granted, and they had
been removed from moving.com for representing that they
had a license when in fact all they had was a pending license. Today, the car was picked up in New
York. The "actual" carrier (Dash is just a broker, apparently.) is Mill Transport Inc. I'm keeping
my fingers crossed, hoping that the car arrives undamaged, unstripped, and unstolen.
August 10, 2002.
 Well, the truck carrying my Europa finally arrived. To save time, I took
delivery in a nearby town on the freeway and was able to drive it the 8 miles home.
The delivery was at twilight, in the middle of nowhere, so I was
taking quite a chance that the car would run and be driveable. I had expected
it hours earlier, of course. It was a tense drive home in the dark, with me
using a flashlight to see the dials - the dash lights were all out.
Well, the truck carrying my Europa finally arrived. To save time, I took
delivery in a nearby town on the freeway and was able to drive it the 8 miles home.
The delivery was at twilight, in the middle of nowhere, so I was
taking quite a chance that the car would run and be driveable. I had expected
it hours earlier, of course. It was a tense drive home in the dark, with me
using a flashlight to see the dials - the dash lights were all out.
The seller said he mailed me a bill of sale last tuesday, using the priority mail
mailer I gave him, but I havent gotten it. The mailer had a delivery
confirmation number. According to the USPS website, that mailer hasn't been
mailed yet. I wonder if somehow that mailer never got into the mail somehow.
One of the first things I had to do was to renovate the original
equipment Wingard rearview mirror which had fallen off the windshield. It
seems the mirror had broken sometime in the past, and the previous owner (P.O.)
simply took another piece of mirror glass and glued it over the old piece of
cracked glass. I pulled all the pieces out and washed the parts in my sink and
dried them. Then I applied lots of Lexel to the inside of the mirror and added
two small dollops of epoxy putty at each end for extra adhesion and remounted
the mirror. The flexible layer of Lexel will prevent the glass from flying
apart in case the mirror is hit during an accident.
My list of repairs is fairly long. There's an amazing number of electrical
things which are miswired. The first time I drove the car, I saw the ammeter
indicating -20 amps and assumed the alternator was dead. Driving in the dark,
I was sure the lights would fade and the car eventually die. But actually the
battery was charging - the meter had been wired in backwards. The tachometer
is quite dead and a number of switches and dials are wrecked. The unswitched
hot lead is routed to several places it doesn't belong (P.O. did it) and this was
"fixed" by the next P.O. by installing a quick-release battery terminal, so the
battery could be disconnected to prevent it from discharging! Sheesh.
Anyway, the car seems complete and it runs. The engine seems terribly out of
tune, and oil is pouring out of somewhere, and about a dozen electrical things
aren't working right, but I'm sure I'll be happy with it.
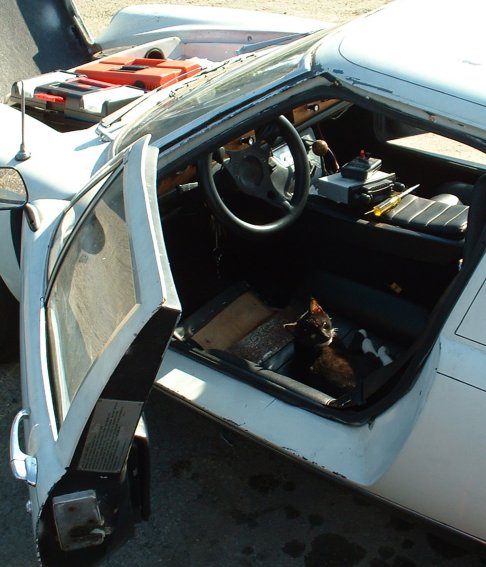
October 20, 2002.
 Some time has passed. After a bit of work, replacing the spark plugs and
redoing the timing, the car actually runs and I've put about 200 miles on it.
Note that the kitty sitting in the car seat has been my only companion
while doing the repair. (He's one of the random cats who are allowed to
roam the area here in order to keep the rabbits out of the flower pots.)
However as far as the car goes, it consumes a quart of oil per 75 miles. That's terrible! I either
have to rework the original Lotus Twincam engine, or put something else in.
The latter is what I'm looking into. More on that below.
Some time has passed. After a bit of work, replacing the spark plugs and
redoing the timing, the car actually runs and I've put about 200 miles on it.
Note that the kitty sitting in the car seat has been my only companion
while doing the repair. (He's one of the random cats who are allowed to
roam the area here in order to keep the rabbits out of the flower pots.)
However as far as the car goes, it consumes a quart of oil per 75 miles. That's terrible! I either
have to rework the original Lotus Twincam engine, or put something else in.
The latter is what I'm looking into. More on that below.
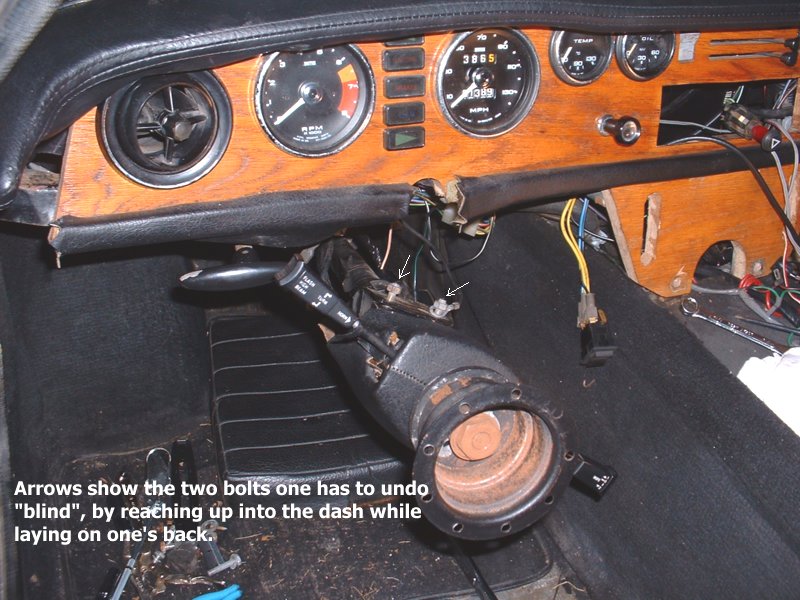
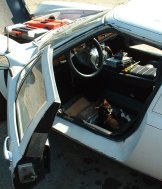
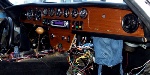
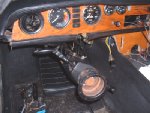 The project right now is to correct 30 years of corrosion and abuse to the wiring.
I need to remove the homemade plywood dash (previous owner) and replace it, and redo all the
connectors. The photo shows the steering column detached - and the location of the
impossible-to-reach bolts which have to be undone to get this far.
The project right now is to correct 30 years of corrosion and abuse to the wiring.
I need to remove the homemade plywood dash (previous owner) and replace it, and redo all the
connectors. The photo shows the steering column detached - and the location of the
impossible-to-reach bolts which have to be undone to get this far.
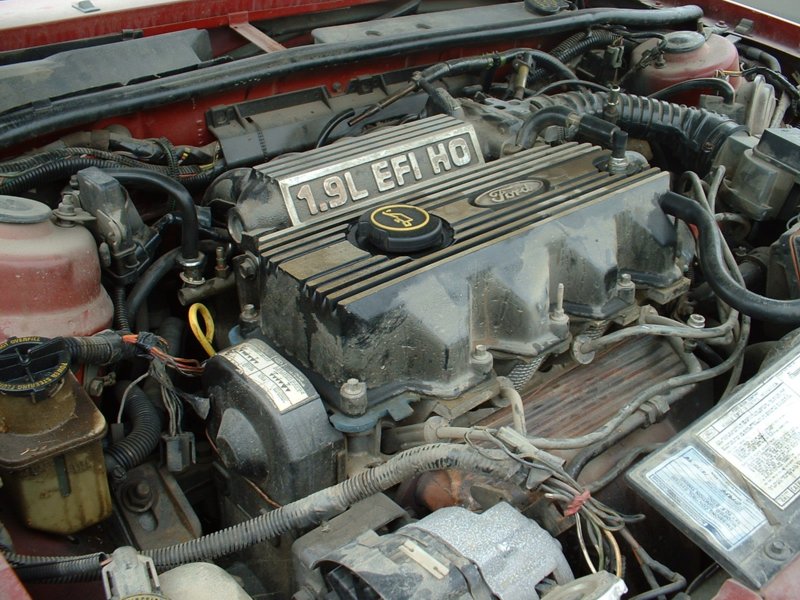
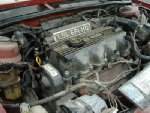 Replacement engine thoughts. After looking at all the possibilities, I
think I found an engine which combines the advantages of an easy swap, recent
manufacture, low cost, and adequate power. This is the 1.9L Ford Escort (and Mercury
Lynx) "EFI-HO" engine. It's only 19.75 inches from bellhousing to extreme front
of the pulley for the alternator, which is only a half inch at most longer than the
1556cc Lotus Twincam. It apparently bolts onto the original bell housing. The "GT"
class Escort had a nice set of headers which look like they could be adapted to
fit as well. The only major problems seem to be the arrangement of the
engine mounts (Escort is a transverse mount engine) and a possible repositioning
of the alternator. Once that is done, here's a 120hp (as stock) engine for $350 (junkyard price)
that's as close to a "drop-in" as any that can be found. Unlike the Zetec option
being pursued by so many current Europa owners, the 1.9-EFI-HO engine has a
compact injector setup which looks like it would fit nicely. The photo shows
an engine I took measurements from in our local junkyard.
Replacement engine thoughts. After looking at all the possibilities, I
think I found an engine which combines the advantages of an easy swap, recent
manufacture, low cost, and adequate power. This is the 1.9L Ford Escort (and Mercury
Lynx) "EFI-HO" engine. It's only 19.75 inches from bellhousing to extreme front
of the pulley for the alternator, which is only a half inch at most longer than the
1556cc Lotus Twincam. It apparently bolts onto the original bell housing. The "GT"
class Escort had a nice set of headers which look like they could be adapted to
fit as well. The only major problems seem to be the arrangement of the
engine mounts (Escort is a transverse mount engine) and a possible repositioning
of the alternator. Once that is done, here's a 120hp (as stock) engine for $350 (junkyard price)
that's as close to a "drop-in" as any that can be found. Unlike the Zetec option
being pursued by so many current Europa owners, the 1.9-EFI-HO engine has a
compact injector setup which looks like it would fit nicely. The photo shows
an engine I took measurements from in our local junkyard.
One note: a lot of Lotus Europa owners are looking too closely at "hp" and "bhp"
in choosing engines. There's more to consider. This Ford engine is only rated at 120hp,
but at lower rpm it acts like a motor with much higher peak hp rating due to its
extremely flat and wide hp/torque curve. I can expect "high driveability" from
this engine in the Europa - a car that pulls away strongly at low RPM's. Other
engines are more "peaky" - meaning that they don't feel strong until one is in the
3500-4500 rpm range. Having no plans to autocross my car, I want more
driveability and am willing to do without the peak horsepower at high rpm
to get it. This should be a strong "cruising" engine. I saved this
excerpt
of a message thread from a forum for Escort drivers, in which there are
obviously some people who think that bringing the 1.9L motor up to 150hp isn't
a big deal. 150hp is an often-mentioned goal for Europas since that's the point
at which the 352/365 gearbox breaks due to exceeding its design limits.
October 22, 2002.
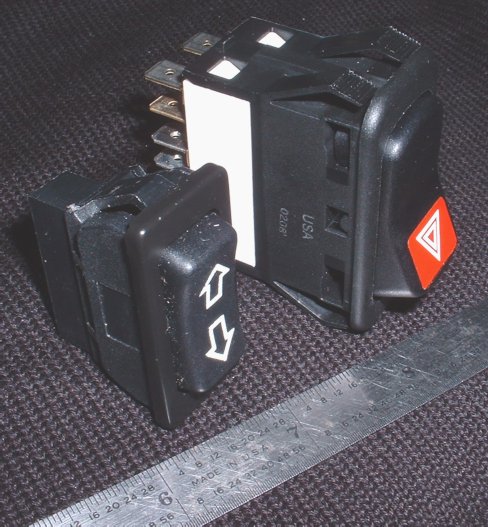
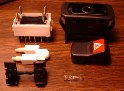
 Parts arrived today from Holden. I had
bought one of the lefthand rearview mirrors, plus one of their extra deluxe
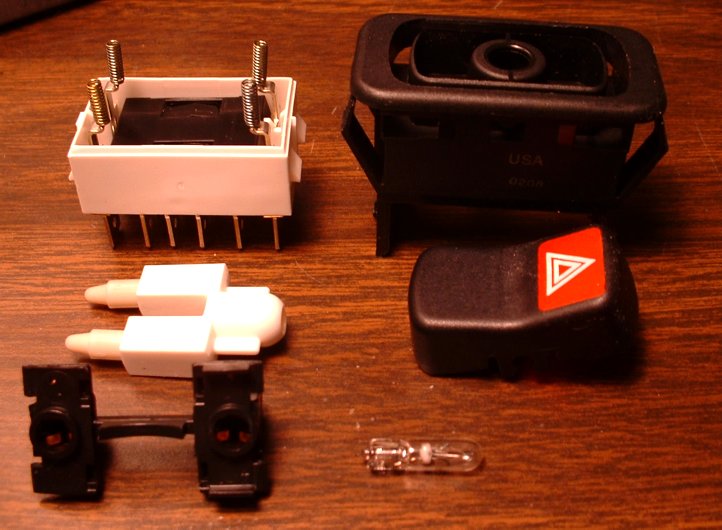
illuminated rocker switches as a sample. Super! The switch was easily the
finest auto rocker switch I've ever seen - solid action, fully illuminating,
and easy to disassemble
as necessary. (The other rocker in the photo is the window up/down
switch from Juliano's, also
excellent, but not illuminating.) I'll post a picture of the mirror
after I have it mounted. Finally, a mirror that doesn't cost a fortune
which is made out of real metal and matches the car perfectly.
Parts arrived today from Holden. I had
bought one of the lefthand rearview mirrors, plus one of their extra deluxe
illuminated rocker switches as a sample. Super! The switch was easily the
finest auto rocker switch I've ever seen - solid action, fully illuminating,
and easy to disassemble
as necessary. (The other rocker in the photo is the window up/down
switch from Juliano's, also
excellent, but not illuminating.) I'll post a picture of the mirror
after I have it mounted. Finally, a mirror that doesn't cost a fortune
which is made out of real metal and matches the car perfectly.
The miniature lance-base bulb inside is 12 V. Holden supplied
the switch without any drawing or schematic, leaving it up to the
hobbyist to figure out what terminals do what. This doesn't
surprise me, since Holden's catalog has the most inadequate
description of their electrical parts imaginable. It wasn't even
clear whether this switch was really self-illuminating or not - their
phrasing could have been interpreted that the switch "shows through"
light from behind the panel, for instance. Regardless of their printed
catalog's inaccuracies, their online catalog is so much worse that
I very strongly recommend going to their site, paying the
$8, and getting the printed full-color catalog, which is a treasure
in itself.
Hazard switches "short together"
all 4 signal lights, then they force on a flasher. Often the flasher is
a different one from the one used for turn signals. I'll make drawings of
the wiring and switch terminal connections as I design the dash, and leave
them here. At this point, I plan on having the following 6 switches in
the Holden type: Headlights, interior lights/panel lights, heater fan (2 speed),
cooling fan manual override (force cooling fan on), hazard, and fuel pump on/off.
The 2 window up/down rockers will be the Juliano's type.
The final dash will differ from the TC Special dash in some more ways. I'm
going to eliminate the clumsy heater vent controls and go back to
the amazingly primitive system used in the S2: reach down and open the vents
by grabbing them and pulling. (!) I'm also (obviously) eliminating the two fragile
pull switches for headlights and panel lights, and in their place with
be two new Smiths gauges: electric clock and voltmeter. I plan on buying
a piece of teak hardwood from Jackel
in Watsonville and cut and finish it myself.
June 4, 2003.
 Fabricating the new dash. Months have passed, and I haven't done a lot of work!
I feel guilty. However, here's proof that I've done something.
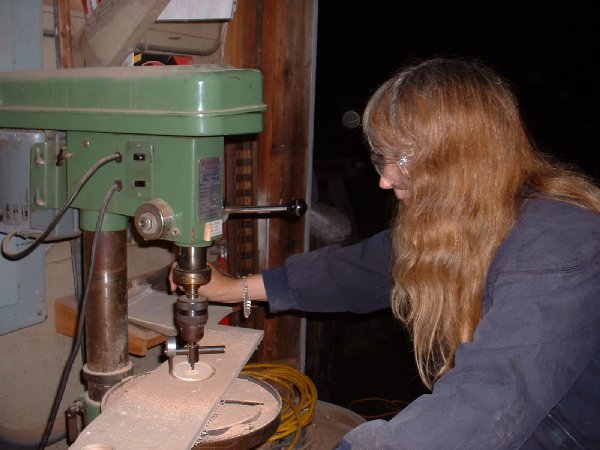
In this picture I'm using a carpenter's circle-cutter fixture for a drill press
to cut one of the dash holes. The new dash design will have all 8 of the original
(for that time period) Smiths gauges, instead of just the 6 used in the stock
car. The two new ones are the Smiths clock and the Smiths voltmeter. So the dash
will look quite different from a stock one, but I think it will be in the
right British small exotic car spirit. In fact, it will look a little like an early AC dash, perhaps. The dash
material is 9-ply Russian birch marine plywood - inexpensive, easy to work with, light,
and completely stable in both heat and humidity. The varnish will be a
traditional marine varnish, about 6 coats. The stain will be a blend of
a teak stain and a maple stain, giving a dark, warm, slightly reddish color. I'll post
the formula here once I have it perfected the way I like it.
Fabricating the new dash. Months have passed, and I haven't done a lot of work!
I feel guilty. However, here's proof that I've done something.
In this picture I'm using a carpenter's circle-cutter fixture for a drill press
to cut one of the dash holes. The new dash design will have all 8 of the original
(for that time period) Smiths gauges, instead of just the 6 used in the stock
car. The two new ones are the Smiths clock and the Smiths voltmeter. So the dash
will look quite different from a stock one, but I think it will be in the
right British small exotic car spirit. In fact, it will look a little like an early AC dash, perhaps. The dash
material is 9-ply Russian birch marine plywood - inexpensive, easy to work with, light,
and completely stable in both heat and humidity. The varnish will be a
traditional marine varnish, about 6 coats. The stain will be a blend of
a teak stain and a maple stain, giving a dark, warm, slightly reddish color. I'll post
the formula here once I have it perfected the way I like it.

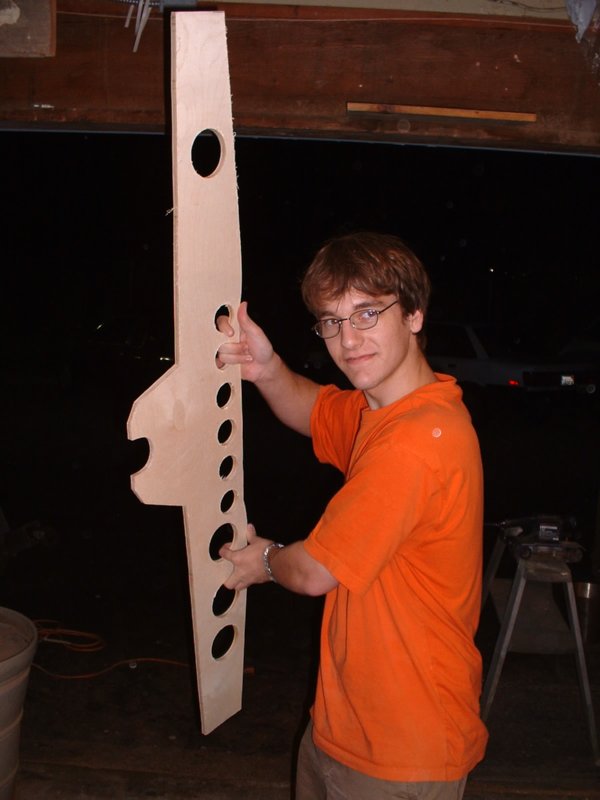
I will add a photo of the complete dash hole pattern later - in fact, eventually
I'll have a dimensioned drawing online so others can duplicate the design
if they want. For the moment, you can look at the photo on the right and
see my son Austin holding the partly drilled dash (as if it were
a Klingon duelling sword!) You can see the locations of the 8 instruments and the 2 vents, but none of the
switch, radio, or indicator holes were drilled when this photo was taken. Note how
all six of the 2-inch diameter Smiths gauges are in an unbroken row along the top
center of the new dash. But the biggest modification is the change in the way the dash
joins to the original ugly center console. The
sloping part of the console will be partly removed and a tiny wood shelf will be
there, with padding and matching vinyl edging. The two window up-down
switches are below the radio cutout in the wood, so there are no
switches mounted in what remains of the front of the plastic console.
The horizontal part of the plastic console is unmodified. The tiny
wooden shelf will look like a change tray or key tray, or it could
possibly hold a small drink. There will be no provision for an ashtray at
all and the place it once existed is cut out and the wood dash is visible
there with the power window rocker switches. More details and photos on all this later too.
Some history. I just realized I haven't mentioned here that this is my 4th Lotus that
I've owned, and my 3rd Europa. If you didn't know that, you might wonder how crazy I
am to have gotten into this exotic plastic British car hobby - but no, it's been
an interest since 1968 when I saw my first one - an orange S2 - and decided I
had to get one eventually. It was 1976 before I bought my first, a 1974 Europa TC 5-speed.
(Not a JPS) I had to part with that later, but I replaced it in 1978 with a
S4 1969 Elan which was upgraded to Sprint-plus configuration (what a fast car...)
plus another 1974 red Europa 5-speed (again, not a JPS.) So for a few years I
had one of each. Money problems eventually forced me to sell the Elan, which left
me with the car I loved most, the Europa. Later in 1983 I had to sell that too, with
the intention of buying a replacement someday. Little did I know I would end up waiting
19 years for the replacement, but finally I have another Europa. I won't let go of this
one.
Sept 13, 2005.
 I'm in a box!. Again, too much time passed. I can't believe a year went by with little done. I
can only attribute the laziness to a busy winter skiing with my children and an overall sense of
inadequacy in the face of the Europa repair.
I'm in a box!. Again, too much time passed. I can't believe a year went by with little done. I
can only attribute the laziness to a busy winter skiing with my children and an overall sense of
inadequacy in the face of the Europa repair.
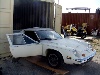
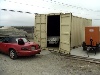
Last year I managed to rent a garage
in a condominium for a while. That was great, but then the owner notified me that the property was being
sold and I would have to move. (A familiar story. I hate renting.) I panicked, but nothing
presented itself. Then on the last day, I drove to Castroville and found a marine salvage
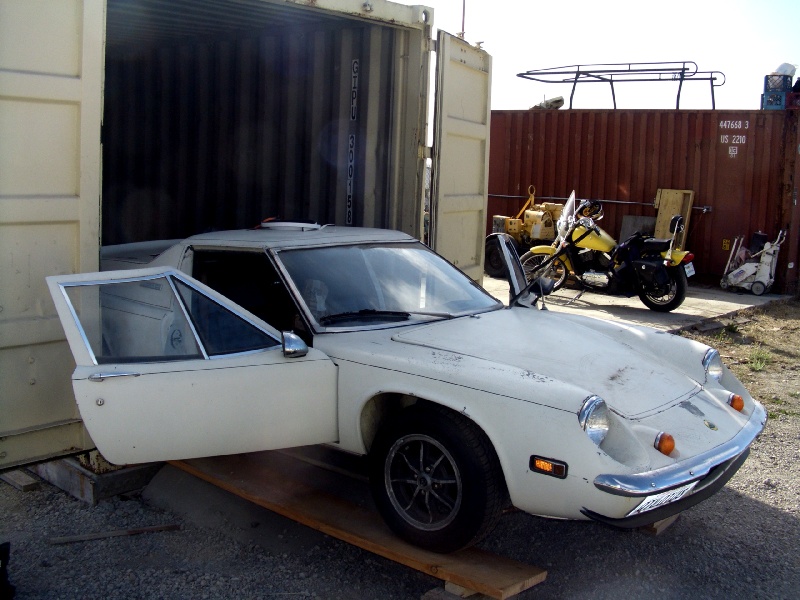
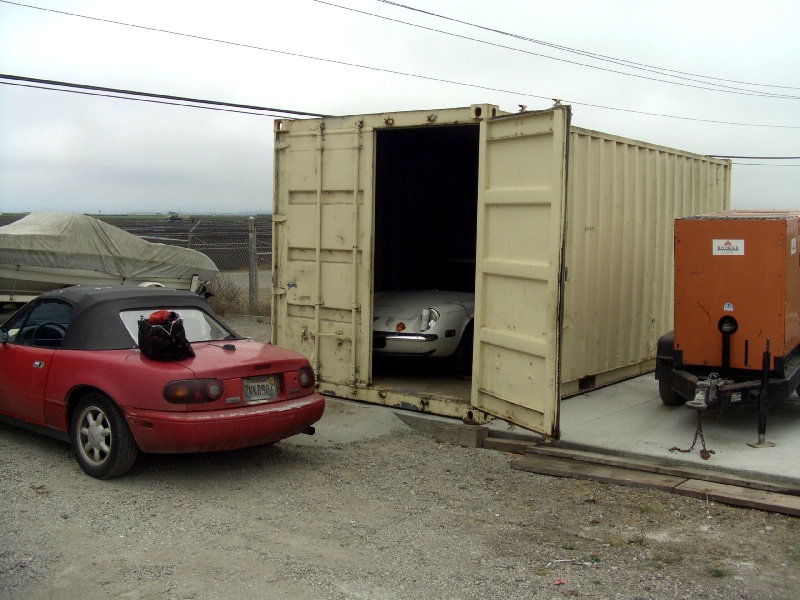
yard there. They had an oceanic shipping box, rusty steel 8 feet by 8 feet by 20, with an interior
wood floor, they would rent me to put my car in. That's too narrow to have both car doors open at the same time,
but as you can see in the photos I solved that problem by building moveable ramps that
serve the dual purpose of allowing me to drive in and out, or alternately, to just slide the car out
onto the ramps at a height of 10 inches or so, allowing me to open both doors, get good light,
and possibly crawl underneath (I'll need more safety precautions before I do that.) Now, I'm working on
the car every weekend. The key, for me, is that I have to have a pleasant place to do the work.
In the background you can see my new motorcycle, a 1996 Vulcan 800. It's
that rare kind of used vehicle, one which works properly and needs no repair at all!
Sept 14, 2005.
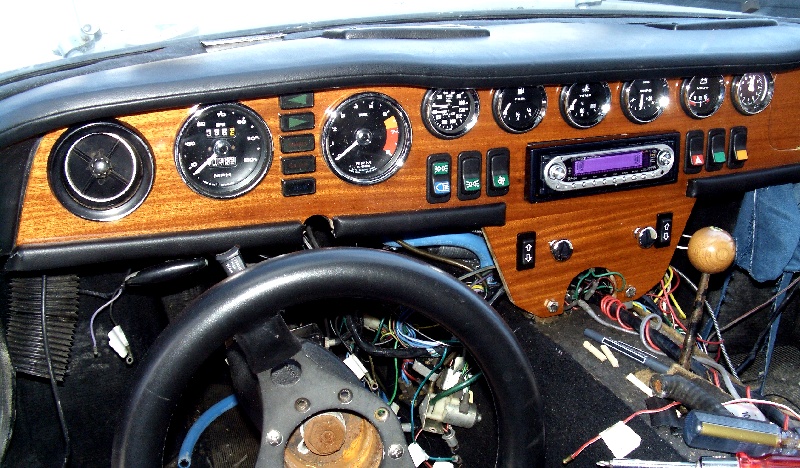
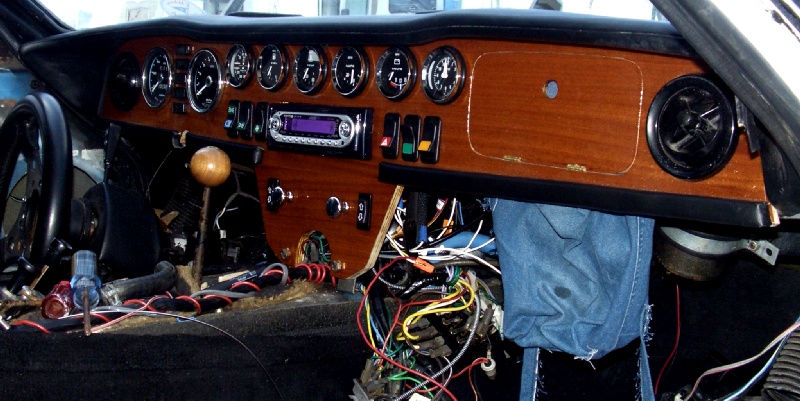
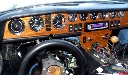 Preview of redesigned dash. Finally, the dash is almost installed. The photos show how it will look. They were
taken with the dash bolted into place, but with no instruments or controls actually wired properly.
Preview of redesigned dash. Finally, the dash is almost installed. The photos show how it will look. They were
taken with the dash bolted into place, but with no instruments or controls actually wired properly.
Here's what you are looking at. After the speedometer and tach, located where they were originally, moving left to right
we come to the dual oil pressure/water temperature gauge, then fuel gauge, water temperature, 30-0-30 ammeter, and clock.
Note that the two temperature gauges are there for a reason - the first measures temperature at the radiator inlet, the
other measures temperature at the engine water jacket. Having two temperature readings allows one to evaluate the flow rate of the coolant.
 To the right of the instruments is the glove box. As you can see, it has a hinged cover. This has two Neodymium magnets
at the corners, holding it tight to two embedded pieces of steel there. I used strong magnets to reduce the chance of
a rattle. The cover opens by inserting your finger into the central hole and pulling. Using a finger hole instead of a drawer pull is a
typical marine style of cabinetry. The glove box itself is not so much a box as a bag - I'm using a bag I sewed from heavy fabric instead of a box. The idea
is to make the bag more adaptable to the available space behind the dash, allowing it to hold larger, oddly shaped objects, while also
being more resistant to rattling of its contents than a hard box would be. The bag attached in this photo is a temporary one -- I will be making
a second one. The bag ties to something under the dash (windshield wiper motor) to hold it up and open. I may put a support under the bag if I feel like it
needs one later.
To the right of the instruments is the glove box. As you can see, it has a hinged cover. This has two Neodymium magnets
at the corners, holding it tight to two embedded pieces of steel there. I used strong magnets to reduce the chance of
a rattle. The cover opens by inserting your finger into the central hole and pulling. Using a finger hole instead of a drawer pull is a
typical marine style of cabinetry. The glove box itself is not so much a box as a bag - I'm using a bag I sewed from heavy fabric instead of a box. The idea
is to make the bag more adaptable to the available space behind the dash, allowing it to hold larger, oddly shaped objects, while also
being more resistant to rattling of its contents than a hard box would be. The bag attached in this photo is a temporary one -- I will be making
a second one. The bag ties to something under the dash (windshield wiper motor) to hold it up and open. I may put a support under the bag if I feel like it
needs one later.
Below the two-inch gauges are the six ultra-deluxe lighted rocker switches: Headlights (off/parklights/headlights), interior lighting (off/Dashlights/interior),
plenum chamber fan (off/medium/full), hazard switch (off/on), radiator fan force-on (off/on), and one uncommitted switch.
The space formerly occupied by the window controls and the ashtray are now usable, since I have modified the central console moulding. Now the window up/down
rocker switches (not lighted) are located where the moulding used to cover the stock dash. Between the window controls are the two heater controls. Instead of the old slotted lever arm controls in the
Special, now two chrome pulls give easy access to the heater, with a significant savings in dash space. Below the window controls and heater controls will be
a finished wood abutment about 2-4 inches deep, bridging the space to the console moulding, with black vinyl padded edging all around. I will be able to keep
coins, sunglasses, or a cold drink there. (Oh no, sounds like a SUV!)
Now, I'm working on the rewiring. This will take at least 4 weeks. (about 50 hours of work.)
Oct 31 2005
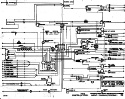 Schematic of Early Special. Online resources have various schematics of the car, but strangely there is no schematic for the early Special, only the late Special. So I scanned my copy. The linked image is an enormous 16-color gif suitable for further processing or high resolution enlargements. Your browser may not be able to handle such a large image, so save it to disk instead and use a graphics utility. This is a good schematic to blow up to 24-inch width for when you're working in the car. The handwritten corrections are ones I did based on my car.
At the moment, I'm drawing up a new schematic showing how I'm rewiring the new switches and meters on the dash, plus the other changes.